Viewers

Monday 4 November 2013

The Skort - Part 1/3 "Cool Tone"

Good evening Sydney siders. While I should be studying for an exam thats in 2 days.. somehow making a blog entry on how to wear Skort's seems a bit more important on the priority list (It's going to bite me in the butt later. I know it.)

 The next few posts will be on how I style different coloured skort's ranging from cool tone, warm tone, to mixed toned.  Today's post is the 1st of 3 - The Cool tone Skort.

Firstly to start things off -  I got a bit excited as I haven't blogged in almost 4 months (forgive me, blame the weather). Here's a *click click snap* of my excitement for this entry!


My apologies in advance for the super dim photos and boring scenery. I did initially want to take photos outside -  I had just bought a new camera and it took me a few minutes... to an hour.. to learn how to use it properly (hand gestures activates self timer which makes things ALOT easier!). 


Anywho by the time I actually got the gestures working, the sun had already set. THE SHOW MUST GO ON!  

There is nothing that scream more "cool" then a deep cool-toned blue to steal the show. This royal blue skort is a mid rise skirt/short however I'd much prefer it to sit high rise as the asymmetrical points already help elongate the stems, it could do a little more if it shaped the waist. Whatever. work with it. I threw on a baggy white boyfriend tee to tone down the femininity and make it more of a  sporty chic kinda tom boy look. Rule of thumb (Anita's thumb anyway): If one must be tight, the other must be baggy. The contrast fit of the loose white shirt with the dark structured skort really gives that edgy, effortless, "I just chucked on whatever I could find.. and still look fab!" vibe.  


Here we have the whole outfit. As the outfit is a bit plain, gotta accessories and add some depth with the hair and the shoes. (And the contouring!)


 The simplicity of this outfit not only looks CHIC and Trendy,  but if an unplanned turn of events involves you having to giddy up (you will be able to run like a man and not worry about revealing your knick knocks to the world.)  


Security of a pair of shorts, femininity of a unique looking skirt. 2 in 1.


The shoes I wore to complete the look are a set of black cut out boots from Urge. The tough look of the cut out boots detailed with the silver hardware really brings together this edgy theme for this cool toned skort. A bit of heel just adds a touch of sophistication to the look, comfort to the sole and elongation to the stems! Presto good to go!


Items worn/mentioned:

Urge Boots - Style Stread $136.00 something
Blue Skort - Blockout - $39.00
Bracelet - Etsy - gift from Brandawgs 
Chain - T&Co - $90 
Pendant - Sterling Silver No Brand - $?
MK5128 - $240
Camera - Samsung $170 - Kogan $29.95 Shipping (Very fast!)

Lip - Milan NYX Matte Lip Creme - $12.95 (NYX now in Target AUS!)
Waves - VS Curling iron $39.95


Stay tuned for Part 2/3 and 3/3 of How I Style Skort's! Any questions on where I got any of the above items -  Feel free to shoot me a message!

<3 Anita


Saturday 27 July 2013

The Geometric Pants


Things worn:

Wittner Shoes - $169.95
Black Blazer - Forever 21: $100RM equivalent to $30 something AUD
Geo Pants - Forever New: $60 (SALE)
Black Top - Tokito: $24.95
Necklace - Kardashian Collection: $12.95

<3 Anita

Thursday 25 July 2013

DIY: How to clean your make-up brushes

Good Evening Sydney Siders! Today's post will be about how I clean my make up brushes! There are two types of clean that I do: 1. Spot Clean & 2. Deep Clean - Now, the spot clean is done every morning before applying make up, on account of there's always freshly left over residue from the day before. However, over time you need to give your brushes a deep clean to really get the yucky stuff from deep within your brushes as the daily spot clean can't remove completely.


SPOT CLEAN

Things you will need:

- cotton pads (Kmart, Coles, Priceline)
- bottle of brush cleaner spray (Priceline, Beauty bay, Crush cosmetics, Cherry culture, Sephora, eBay)


Step 1. Take a cotton pad and lay your brush in the centre of the pad

Step 2. Grab your bottle of brush cleaner spray and give 2 pumps to wet the brush


Step 3. Pick up your brush and wipe back and forth on the cotton pad until the residue starts coming off (the white cotton pad will start to get dirty)

Step 4. Keep repeating the above step until it looks clean and smooth. Take the cotton pad and squeeze the brush and wipe down (make sure not to be too hard incase you pluck some hairs out!) - This will squeeze excess water out and shape the brush ready for drying.


I mostly only spot clean my eye liner brush. Sometimes I include my shader brush and fluffy blending brush depending on how dirty it is. I don't spot clean my foundation brush as I only use it when applying liquid foundation (which I only wear on night outs). Everyday I use my fingers to blend in my BB cream and a flat Kabuki blending brush to distribute the product . I then use a big fluffy powder brush to dust a translucent setting powder over (because the powder is dry and translucent, I don't find it necessary to clean everyday).


DEEP CLEAN

Things you will need:

- Baby Shampoo (Priceline, Target, Kmart, Coles, Woolies etc)
- Paper Towel 
- Something to use as leverage when drying brushes e.g. long box, hair spray bottle (anything long)


I've chosen to use Johnsons Baby Shampoo, it was around $6 bucks from Priceline (choose something good/high quality. Remember: your brushes ARE your babies)


Step 1. Put paper towels over your leverage object, so you brushes have something to lean on when they are dripping dry. The reason for the leverage is so that the water in the actual brush will drip downwards when it is placed on an angle. This is VERY important as you don't want any water to remain at the roots of the brush as it may loosen up the glue - which ultimately shortens the life of your brushes.


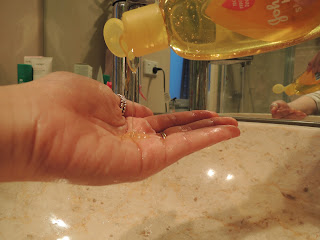
Step 2. Squeeze a generous amount of of Baby Shampoo in the palm of your wet hand.


Step 3. Grab your brushes and one by one wet the brush and start going back and forth against your palm.


Repeat over and over until the brush begins to look and feel cleaner. Watch the dirty gunk run through your hand until the water runs clear (this is when you'll know its clean).


Repeat same process with all other brushes.


Don't be alarmed if you see orange water. That's just your face running down the sink haah.


The Eye liner brush will be fairly easy to clean if you use gel liner. However if you use something super water resistant and waterproof like me (MAC liquid last) it will be a tad difficult to remove the make up as its totes WATERPROOF. In this case, if the make-up really refuses to let loose, get your make up remover (Neutrogena Oil Free Eye Makeup Remover or
Maybelline City Rescue Total Clean Express Makeup Remover) and use a small amount to help breakdown the residue.


Step 4. Don't forget your brush cup holders! No point cleaning your brushes and putting them back into a pit of dirtiness!


Step 5. Dry by elevating brush with fluffy side facing down.

Viola!

Products feat. in this post:

Blending brushes & blush brush from Mineral Muse (My Sister's online shop - Check it out! Free Shipping & Tracking now available
Glass jars $2 - $6 - Any bargain shop
Anna Sui dupe holder, mirrors, and cotton pad dispenser $12 - $28 - Some Korean store in Strathfield plaza 


If you're lazy like me, you may deep clean once a month... or even 3 months.. (thats dirty). TRY to deep clean once a week. I know what you're thinking "EVERY freaking week?!?! Ain't nobody got time for that?!" - BUT this will improve your face hygiene!

Adios Amigos & Good Luck.

<3 Anita 


Thursday 27 June 2013

OOTD: Casual Chic

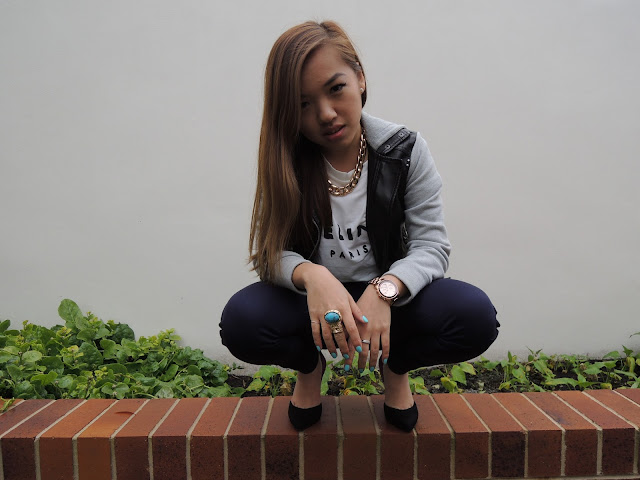
Bonjour Sydney Siders. Today I fell out of bed and into these super super tight pair of Dr Denim's that I swore I wouldn't have fit. Some how I ended up getting into them.. Viola! I chucked on a classy Celine tee along with an edgy biker jacket to roughen up the look. To feminise the outfit, I added  a chunky gold chain necklace along with block coloured heels. Jeans with a Tee are core essentials on casual days.


Things Worn:

Jacket: Tattoo $50
Jeans: Dr. Denim - Plenty Blue $99 (General Pants)
Heels: GUESS - Hosanna - $169 (Sale $99)
Top - Celine dupe - eBay - $40
Gold Chain - Colette - $12.95 (Sale)

Credits: Young Savvy & Sydney & my dog Tika


P.S I have now enabled comments that can be made by everyone and anyone (yes it took me 5 months to figure it out) even if you're not registered - feel free to drop a comment!


<3 Anita

Tuesday 25 June 2013

OOTD: Retro

Good morning Sydney Siders. Today's outfit is a 60's inspired look, perfect for a day off work. I channeled a minimalist look with a black and white structured top and high waisted disco pants. The lips and block coloured vamps add a pop of colour to this fairly bold outfit.


Things worn:

Top: Valley Girl - $14.95
Disco Pants (Black): American Apparel $80 (online)
Two-tone watch: Gc - $895
Bag: Vintage - $unknown (gift)
Shoes: GUESS - Hosanna - $169 (sale - now $99)
Glasses - P&O $35RM equivalent $11AUD 
Necklace - Kardashian (Equip) - $12.95 (sale)


<3 Anita

From Day To Night (Part 2: Night)

Good evening Sydney Siders. In my last post, I promised you a day to night transition. All I did was switch the patterned peg pants to high waisted bow shorts (keeping the colour scheme) and added burgundy ankle strapped double platforms. It's quick, easy, and has the same classy effect!


Things worn:

Top: Into - $39.95 (Bought @ some boutique in Cronulla)
Shorts: Blue Jade $30
Shoes: Tony Bianco - $80 (Sale) 
Watch: MK - $240 (online) 


<3 Anita